One of my favorite gameplay mechanisms in board game is tile laying. We lay a tile of a cardboard or card usually trying to connect things that are depicted on the tile.
For one, those games will have spatial aspect. The position where we place the tile usually matters. Other than that, it’s like playing jigsaw puzzle where we can see the result and how the tile grows. There is a sense of progression.
By laying the tile, it actually helps visualize the next result how to connect the next tile. In this next game called Miyabi, we can also build up by laying the tile on top of other tiles. That gives extra difficulty from the basic tile laying mechanism that usually just one layer.
So, what is this Miyabi game? How do we play the game? Is there a solo mode for this game?
Those are probably just a few questions that came to mind after hearing about the game. Well, in this article, I’m going to share with you my Miyabi Review based on my experience on playing the game and what I can find from the internet.
Hope this helps. Is Miyabi going to be the best tile laying game out there?
Click or tab on any sections from the table of contents to jump right to that part. Use the red arrow button on the bottom right corner of the screen to head back to the top.
Table of Contents
Overview
Game’s Title: Miyabi
Genre: Tile Placement Game, Competitive, Polyominoes Tiles, Open Drafting, Japanese Garden Theme.
Designer: Michael Kiesling
Artist: René Amthor
Publisher: HABA
Number of Players: 2 – 4
Playtime: 45 minutes
Official Website: Miyabi (haba.de)
Release Year: 2019
Price: US$ 40
Content:
1 Rulebook (EN/FR)
4 Garden Game Boards
1 Score Board
24 Wooden Lanterns
8 Wooden Scoring Stones
4 Frog Markers
1 Info Card
6 5th layer Bonus Tiles
5 Expansion Tiles
1 Round Marker
16 Zen Tiles
1 Bonsai Tree (2 pieces)
96 Garden Tiles
About Miyabi Board Game
Miyabi is an abstract board game with Japanese Garden as the setting. According to the rulebook, the word Miyabi (雅) is Japanese for elegance, grace or refinement.
Creating a Japanese style garden can be a form of art where every object placement is planned. We have to mindfully decides where to place stones, bushes, maple trees, pagodas and pond of fishes on varying elevation in the garden.
In this game, players are trying to build their Garden by drafting tiles and lay them on their player board. The tiles are polyominoes from 1 space or monominoes, 2 spaces or dominoes, or 3 spaces or trominoes.
Depending on the tile size, each tile will have from one up to 3 objects of one type. They can be either Maple trees, Pagodas, Fishes, Azalea Bush, Boxwood Shrubs or Stones.
Everytime we draft the tile we immediately place them on the player board with a 6x 6 grid. There are restrictions as where we can put them.
First, the section of the tile that depicts the objects must be placed on specific row for that object. The other part of the tile can go in any direction as long as it occupies an empty space and stay within the grid.
As the second restriction, the placement of the part with object must be placed in an empty row. Each column can only be taken once per round while we can still place tile with the same object multiple times.
Focusing on certain rows or certain objects might lead to placing on higher elevation. If we can stack those tiles on higher elevation, the objects are worth more. The first one to reach the 5th level of each object type will get even more bonus.
But the tiles on the higher level can only be placed if all parts of the tiles have something to put on. We cannot place them hanging. So, we want to go higher but we also need to prepare the foundation to lay those tiles on higher level.
It’s like creating a landscape with organic contour level with some hills or valleys. The lower one must be bigger than the top.
While trying to do so, we eventually have to cover the objects from the tiles on the lower level. By the end of the game, all 36 spaces can have objects or there are only a few objects while the rest are empty spaces.
This will affect the score at the end. Players will compete to have the majority of each row or objects. There are also a couple of end game bonuses based on how visible those objects are.
At the start of each round, players will know all of the 6 possible tiles that they can take and place on the board. From that, players will have to find balance to make sure that all of them can be placed by following those 2 restrictions.
As a competitive game, the other players can also take some of the tiles that we thought can be a perfect fit on our board. So, there is some strategy aspect to it but we also need to be tactical and switch to different plan from time to time depending on what’s still left.
Depending on the number of players, the game will end after a couple of rounds. Whoever score the most points, wins.
Miyabi is part of the game from HABA, a publisher known for their kids-level game. This is more like a family edition line.
The next video below is a trailer from the publisher in German language.
Components
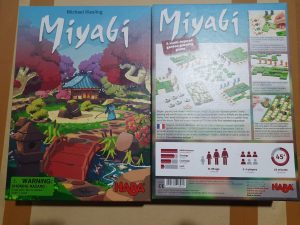
The game of Miyabi comes in a rather medium size box with 22 x 31 x 6.7 cm as the size in vertical orientation. It has a very beautiful and colorful cover that depicts a Japanese Garden. Honestly, this cover is what makes me buy this game.
Some people say that the font for Miyabi looks like Miyagi, which is also a Japanese word with different meaning. On the back, we can find subtitle for the game that says A MULTI LAYERED GARDEN GROWING GAME.
From what I understand, every printing version of this game always comes with 2 languages. The game itself is language independent but the rulebook will have 2 parts for the 2 languages.
The copy that I have is for English and French. On BGG, the available versions are Dutch/French, English/German, French/Dutch, Italian/German, Spanish/German, aside from what I have here.
On the back of the box, we can find more illustrations from the setup and how the game will develop and scoring at the end. Each illustration will have a brief explanation in those 2 languages.
There is also some unique metrics to give some ideas for the gamers whether the game is leaning more to strategy or luck or randomness. The interesting one is they say that the game is very addictive. It seems that a lot of German publishers are doing similar things for their game.
It also says that the recommended age is between 8 to 99 years old. The maximum limit is more like a joke. Inside the box, they use the wall of the bottom box to put a bit of biography for both the designer and illustrators, which is nice. This way, they don’t take up space from the rulebook.
At the bottom of the box, they printed the list of all Garden Tiles that will be available in the game with illustrations on a single sheet of paper. I thought it was printed on the box itself.
For the components, we will get a huge plastic bag of cardboard sheets, another one for paper sheets, and one zip lock bag for the wooden components. They also include extra zip lock bags after we punch out the cardboards.
The box itself is actually bigger than it needs to be. After we have punched out all of the cardboard tiles and tokens, the box will be empty. We only need like just maybe 20% of the size to keep all of the components after removing the cardboard sheets.
The things that will prevent the box size to be even smaller are rulebook, player board sheets and the Score Board. Even those 3 are significantly smaller than the box size itself.
While I do wish the box is smaller but with the size as it is, I can use big plastic containers to separate those tiles. Even then, we still have big empty space, especially if we throw out the cardboard sheets.
What I use is actually a food container with 200 ml capacity. I need 5 of these just for the Garden and Zen Tiles.
This next video below is an unboxing for Miyabi from a Spanish channel, Territorio Oca.


Rulebook
On BGG, the publisher only shared the English digital version. As I said above, there are a couple of printing versions for different languages from English, German, French, Dutch, Spanish and Italian. We can find the digital files for those languages on the publisher’s page.
For the printed version from the game, they printed both languages as a single rulebook on different end of the pages. We can flip the book to read the other one.
This is a unique rulebook in the board game industry. Usually, the size will be almost the same as the box itself. Instead, this one has a square shape with 20.5 x 20.5 cm as the size. Each language will have 10 pages, so the page in the middle will be the last page.
Here is the table of contents for each version.
Cover and Introduction (Page 1 – 2). For the cover, they use the same art as the box cover but only for the square size. Oddly enough, they only show game’s criteria for number of players and recommended age but nothing else that we can find from the box.
We can also find the publisher logo at the bottom right corner. For more credits, there is a small section on the second to last page which only shows the name of designer, illustrator and one editorial staff. More information about the publisher can be found on the back of the box.
The introduction part gives some context about the theme but not exactly about the gameplay.
Contents (Page 2). Here, we have a list of all components in the box, including those from the expansion modules. Each will have an illustration and the number of components for each type. Specifically for the Garden tiles, the varieties and number of tiles can be found at the bottom of inside the box, as said in the rulebook.
We can also find the list of icons for Garden Objects that we see from the game. A bit of minor complaint about this is the color. They use different orange color pieces between the printed rulebook and the actual components. I guess the other is not accurate as well but we can easily tell about the orange.
Game Setup (Page 3). There is an illustration that shows the setup for 4 players. Somehow the setup seems to depict a combined pile of Garden tiles and doesn’t use the box lid as the rule suggests.
The combined pile is not a big problem but I thought it will be easier for setup if we separate them based on size. This setup is also only for the base game, without the expansion modules included in the box.
How to Play (Page 3 – 5). This section starts with the different number of rounds and tiles to use depending on the player count. It continues with the turn structure of each round for the base game only.
Players get to take one garden tile and place it on the board or pass, mark the column with the lantern and do scoring. Each player will always get up to 6 turns per round.
The starting player changes from one player to the next between rounds. With 2 players, both will get the same number of becoming a starting player. In 4 players, each player will only get once, while with 3 players, one of them will only become the starting once.
This section also covers about how the 5th layer bonus works. Only the first player to reach the 5th layer for the row gets the bonus and take the token or bonus tile.
End of the Game (Page 6). This one basically explains the last scoring conditions from the base game which is just majority of each row. Player who has the most object of each row will get each row bonus up to the second place.
Tied for number 1 is possible which both players will get the higher score but the third place won’t get the second bonus. If the tie is between the second and third place, both players get the second bonus.
There is no suggestion for tie breaker.
Expansions (Page 7 – 9). This section explains how we can add the 5 expansion modules to the base game, individually or in any combination. 3 of them are just additional way for scoring but still can impact the decisions. The other 2 require some extra setup and actions.
The Colorful Garden Module is about adjacent objects which is worth 1 point per object. It doesn’t matter if the objects are on different level.
The Big Meadow is the opposite of the Colorful Garden. This will give score 2 points per empty space or green space in the largest connected group.
The Zen Garden will use 5 random Zen tiles out of 16 as setup, replenished immediately after player has taken 1. We can only place Zen tiles on the lowest layer of the board which will immediately give 1 point after placement.
Objects around the Zen tiles, even in the corner is worth 1 point but only if the Zen Tile is completely surrounded. The Edge of the board counts.
The scoring also happens right after the Zen tile is surrounded and the object on that Zen tile will give 1 extra score. After that, the Zen tile will not give score again for being surrounded by different objects.
Also, players can only take another Zen tile after the previous one has been completely surrounded. Unlike regular tiles, we cannot place any other tile on Zen tiles.
For the 7! module, this will only give additional scoring at the end. That is if players managed to have a total of 7 objects from each row or column.
The Frog module will give additional and optional action every turn to move the Frog. Moving the Frog can happen before or after the regular action. The starting place on the board is up to each player.
Movement can only happen on the same level or higher up to 1 level. Silver Frog cannot move to an object while the Gold one can. We turn the Frog into Gold if we can move it to 4th level. Also, we gain 1 point when the Frog reaches level 1, 2 points for Level 2, and so on.
This module will not give any score during the end game scoring.
Short Rules of the Game (Page 10). This is the rules summary and meant to be the last page. The summary covers from the idea of the game, setup, how to play and end of the game scoring in this single page.
The gameplay of Miyabi itself is very elegant, simple action but has depth for making the decision. Michael Kiesling, the designer is known for that.
Even after 3 years since the game has been released, there are not many questions on the forum about the rule. There are a couple of questions asking just for clarification.
One of them is whether we can go up more than 5th level which the answer is yes. Another one is whether we can pass by choice or not which the answer is no. We have to pick any tile if we can fit into our board.
About the scoring with the majority bonuses, somebody did ask whether in 2-player mode, the second player still gets the lower score. The rulebook only talks and gives example for the higher player count.
Even if the gameplay itself is very simple, since I learned mostly from watching playthrough videos, I missed a couple of rules and played with the wrong one. I assumed it works similarly.
For example, I was wrong about the scoring for the Zen Garden Module. I thought the scoring only happens at the end instead of when the tile is surrounded.
So, overall, the rulebook explains the rule very well, mostly because the gameplay itself is already elegant. There is still enough space for the clarifications mentioned above.


Wooden Scoring Stones
The next component type from Miyabi is the SCORING STONES. These are essentially just generic cubes. We will get 8 wooden cubes with 4 colors, so each player will get 2 with about 1 cm in size.
The purpose of these cubes is to track score. We will be placing both cubes on the scoring track. One cube will go on the track from 0 to 50 and the other cube will track which 50 we are on. More about the Score Board later.
If somehow we lose them, we can easily replace them with generic cube pieces from game store or maybe from a different game. I think we can find one with the same size but usually what’s available will be smaller.
In my opinion, either the space from the Scoring Boards needs to be bigger or the cubes should be smaller. If we play with 4 players, when multiple cubes occupy the same space, the space can still fit those 4 cubes. But it’s like we need to put them very close to each other. Alternatively, we can always stack.
The 0 – 50 track is probably not the problem as most of the time players will get different score even just 1 or 2 points away from each other. The problem is to track the 50s groups. Most of the time the cubes on this will stay in the same space, unless the player is playing very poorly or much better than the other.
It’s rather crowded, even with just 2 cubes. Luckily, it is a linear track and on the edge of the board. So, we can just place the cubes not on the board.
I guess the bigger issue for replacement is finding the one with the same exact color as the Lanterns. The colors that they use are black, teal, orange and pale yellow, at least, from my copy. Aside from black and probably orange, these are not the typical colors that other games would use.
It’s not that the specific color matters to the gameplay. We just need to find one that is distinguishable from the other player’s color.
I want to say that we can probably use different pieces, not just cubes as replacement. But we need something that can stand with very small footprint.


Wooden Lanterns
The next wooden components are the LANTERNS. We will get a total of 24 Lanterns with 4 different colors so each player will get 6. The size is about 2.8 cm tall, 1.3 cm in length, and 1 cm in width.
Each of them is supposed to be identical with the lantern shape from Japanese style garden with a roof shape at the top. More like a wooden or stone lantern they put on the ground instead of hanging.
In every game of Miyabi, each player will always use 6 of these of the chosen color, which is the same as the cubes. We will place these on the Player Board.
The purpose is to mark which column from the player board’s grid that we have activated by placing the tile. Each round, each column can only be occupied with 1 object placement from the tile. Once we’ve placed an object on that column, we need to place the next one on different column. It will reset on the next round.
So, after the placement, the top of the grid will have a spot for these lanterns, one for each column. We can place the lantern there to indicate that the column has been taken.
The footprint of the lantern itself is bigger than the cubes so it can stand on the board steadily. While the rule suggests keeping them standing whether on or outside the column, usually I just lay them down to indicate not being on the spot.
They could have been just another cube but the lantern shape is nice among the landscape that we are creating. So, we can easily just replace the lantern with other game pieces should we lose some of them.
Since they will be placed near the top edge of the player board, it can be any shape or form. As long as it doesn’t exceed the width of each column, which is about 3 cm. They don’t even have to be standing.
Technically, they don’t even need to follow the color of the cubes. Players can mix their lanterns with each other because we won’t be handing over these lanterns to other players. It’s just, using the lantern with the same color as the cubes will avoid the confusion for players.
The lanterns can all have the same colors for all players.

Frog Markers
These are the last wooden components in Miyabi. They are the green square wooden tiles that depict a picture of a frog on both sides. One side will have a smaller frog printed with silver color while the other side has a bigger frog with rather gold color.
The game comes with 4 of these identical pieces to support each player. We will only play with this is we include the Frog, module to the base game. The size of this Frog tile is about 2 cm on the side with 0.5 cm thickness.
In the game, we start by placing this Frog tile anywhere on the board inside the grid with the Silver side facing up. Each turn, we can move the frog one space orthogonally, around the board still inside the grid before or after the turn of placing Garden tile.
What we are trying to do with this Frog module is to move the Frog to the top of Garden tiles. The Frog can always move upwards up to one level above but not downwards.
Each time we move the frog to the higher level, we get bonus points, 1 point per the elevation level that the Frog has landed on. So, if the frog gets to Garden tile on elevation level 1, the player gets 1 point, 2 points on level 2, and so on.
The challenge is that when we cannot place a Garden tile where the frog stays. We need to move it first or we lose the chance to place the Garden tile. So, we have to make sure that we can keep moving the Frog.
On Garden tile, there is another restriction, the Silver Frog cannot move onto an object, so it will be even tighter. Only the Gold Frog can move through any object. To change from Silver to Gold, we first have to move the Frog to the 4th layer.
That means, it can still go to the 5th layer even if the fifth layer is just a single space, already occupied by an object. But that is not the case with the 4th layer. We still need an empty space so the Frog can still land on that level.
So, playing with this module can increase the difficulty significantly, at least in later rounds. Because if we cannot place a tile at all, including because of the frog, it’s like getting eliminated for that round while the opponents can keep playing.
I honestly don’t like deciding where to put the Frog at the start of the game. Maybe the tiles from the market can give more directions as where we will focus on, but we don’t know which tile will show up in the next round.
Most of the time when I play, I just place the frog, a bit far from where I’m building the landscape and then I kind of ignore the frog. Only until the placement of the tile is getting closer to the frog or I have a good second level situation to give flexibility to the frog, then I will start moving.
Usually, it is not just one space but several. I just assume that I have accumulated action points from earlier turns. Then I move the frog as if I have done it in previous turns. Or at least, I give myself extra movement like one extra space.
Another challenge would be from the opponents. We need to be careful as the tile we thought could fit the board can be taken by the other players. If that tile is the only one that works for our board situation, then, we won’t be able to do an action until the end of the round.
In this game of creating hills, most of the time, we will only get 1, maybe 2 hills. Obviously, we want to move the Frog closer to those hills to get the bonus. Of course, there is a chance that the frog might get stuck somewhere and with random tiles that will come out, we might need to aim to slightly different location of the hills.
If the frog is stuck, not getting more points from the Frog is probably not the worst problem. It’s that it may prevent us from placing tiles subsequently. So, we need to make sure that the frog will not stuck like in the middle of the board. That is why there will be times when we don’t move the frog at all.
Moving the frog is not mandatory.


Round Marker
The first cardboard piece that I want to talk about is the Round Marker. It is the red circular tile with a hole circle in the middle. So, it looks like a donut. This is actually the only object that I don’t know what it represents from a Japanese style garden.
The diameter is about 3 cm for the outer size and about 1.4 for the hole and about 0.25 cm thickness as all of the cardboard sheets in this game. On either side of this marker, it looks like there are some white flowers as the art. Maybe they are Sakura flower but I’m not sure.
The way we use this marker is by placing it on the Score Board. There is a section that has a number from 1 to 6 that indicates the round. We have to place this Round Marker on one of those spaces, moving it at the start of the next round, so the number will be visible through the hole.
The thing is, next to the round track number 4 to 6, there is an indicator for being the last round depending on the player count. I don’t think the hole is big enough to show the round number and that indicator. Of course, it is not a big deal but I just think it can be better.
I guess that indicator is a reminder during previous round. Player can see that to remind themselves that this is the second to last round.
Since I mostly play this game solo or 2 players, instead of using this marker, I use the lanterns from the other color. I place the lantern on the round track of the Score Board.
Obviously, the round number is no visible this way, but we can still easily tell. By using the lantern, it is more visible than the marker itself as the lantern is standing.
Of course, the marker is a nice production. But with the gameplay itself where the turn order is already determined and no way to change it, I think even the Starting player token already serves this purpose.
The only difference between round to round is the Starting player of the round. So, by keeping track who goes first, we can tell which round we are in. The problem with that would be with 2 players as each player becomes starting player thrice in a game with 6 rounds.
In 3-player game, only two players will become the starting player twice with 5 rounds. While with 4 players, all players get the same chance once as the game ends after 4 rounds.

Bonsai Tree Token
Maybe this is the most beautiful component in the game. This Bonsai tree token serves as the Starting player marker.
It comes with 2 pieces that we can assemble just to make it stands and give some 3-dimensional look. At least, for the bottom part. The overall size is about 5.1 x 4.7 cm with the same cardboard thickness.
The Bonsai tree has red leaves. I guess the art is a bit cartoonish and unrealistic. The size of the branch is too big compared to the pot.
In this game, player who has this token will be the first to take tile. They have access to all available tiles of the round. Before the start of next round, we pass this token to the next player in clockwise order and that player will be the first to draw the tile.
Because we might stack those tiles, being first can be crucial. We can evaluate which tiles go where on our board. Maybe some tiles need to be placed on the board first to be the foundation for the later ones.
At the same time, we can also evaluate the opponent’s board. We can make a guess how likely they will take certain tiles, which probably can prevent us from taking them. That way, we might want to have another plan.
I guess, the token can be a reminder for player to take time before choosing the first tile.
Since the token is big enough and it is standing, unless the player puts it not on the table, it is very hard not to notice, I guess. Personally, I don’t think this token is necessary even though it is a nice production as well.
In this game, there is no mechanism for players to actively change the turn order. The order is already determined right from the start of the game and it will stay in that order for the rest of the game.
Other games might have something different like one player can keep taking this token every round. That is not the case here.
By passing this token every round, we know exactly which round we are currently in. As there are only up to 6 rounds, it is not that hard to keep track and tell who goes first. I don’t even use this token in 2-player game as I can just look at the round marker.
I can see that we can lose track of whose turn is it if one player has to pass. There will be more leftover tiles every round so we cannot count on those. But even so, we can still look at the round marker.
I think it will be more useful if it has a way to help players count to 6 since each player can take up to 6 tiles each round. So, everytime it goes back to the holder of this token, the holder decreases the number and when it reaches 0, that should indicate the end of the round.
Actually, after I tried assembling this token, the hook between the 2 pieces is kind of loose. So, if we pick the token by lifting just the upper part, the lower part will get left behind. That means, we should lift it up from the bottom but the bottom part is too small.


5th Layer Bonus Tiles
These are the 6 circular tiles, each with a different Garden object. From the illustrations, we can see a landscape with 5 layers stacked on top of each other, like a hill. At the top of the hill, we can see a single Garden object from Maple tree, Pagoda, a Fish, Azalea Bush, Boxwood, and Stone.
In the middle of the tile, we can see a number on a Gold background that represents the victory point bonus that we will get. As we can see, the bonus point values are different between each object.
Maple Tree or objects on the first row will give 10 bonus points. The Pagoda or the second row will give 9 points. 3rd row or fishpond will give 8 points. 4th or Azalea bush will give 7, Boxwood or the 5th with 6, and 5 points for Stone or 6th row.
The diameter of each Bonus tile is 4.5 cm. On the back, it will only show an abstract pattern with blue color.
In this game, we are trying to lay tiles with those objects on the tile to our board. We can even stack tiles on top of each other and placing tiles on higher level or higher layer can give higher points.
These bonus tiles will be given to any player who manages to reach the fifth layer first for each object. Players will then take the tile, add the bonus points to the score and prevent the other players for taking the same bonus.
Bonus from each object can only be taken by one player. This introduces the element of racing. Also, it encourages players to focus on certain spot or objects. Spreading out means they will get less chance to reach higher layer for each object.
Since I mostly played with 2 players, I usually don’t use them. It’s not that difficult for me to know that the bonus has been taken and therefore, the other player won’t be able to get it later.
With higher player count, using the tiles will be more helpful. The rule suggests removing the tile or we can just flip it once taken.
The challenge is that there are restrictions as where we can place those tiles. Each column can only be taken once per round and any object depicted on the tile must be placed in the matching row. So, we cannot just stack the next tile on the same location just to reach the 5th layer.
We first need to layout the foundation at lower layer so that we can put more tiles at the top. Because the tiles will come out randomly. Maybe with the right object but it requires a large size at the time we can reach that 5th level.
All we can do is opening those chances so when the tile shows up, we can place those tiles. It’s not a game where we can store the tiles for future turns or rounds. If we take a tile, we have to place them immediately.
This also creates some game arc, at least with the way I play with 2 players. For the first maybe 3 or 4 rounds, I will just build foundations and make it big enough with maybe 1 or 2 objects/rows to focus on. Then, during the last few rounds, assuming the right tiles show up, I will try to just reach the 5th layer as soon as possible with a risk of not being able to place anything nearby right after.
Of course, with the randomness, it is possible that the tile doesn’t show up and we get stuck on the 4th layer. This is why we still need to have alternatives, instead of just a single object or row. Maybe even try to create a possibility to switch to the next row or object.
With that goal in mind, then we will be trying to not just build a tower, where one point has way higher elevation than the surroundings. Instead, we will create a gradual landscape with a chance to make that jump.
While these bonuses are great, but from my experience, it doesn’t mean getting them will make us win. This is a game where we can get up to 300 points or so.
We will only get 10 points or less per tile. Although, at the same time, we are preventing other players from taking it. I guess we can say that the score is much more than what we actually get.
There are other ways to get score in this game. Maybe diversifying with more objects or rows without reaching the 5th level at all can give better score.
If we build like a tower that reaches to 5th layer but the top can only take 1 square space, that is only 5 points per tile. Whereas if the 4th layer is big enough and we can place a tile with a size of 3, we can get 12 points on that 4th level per tile.
We can still reach the 5th layer at that point, even if we don’t get the bonus is somebody else has taken it. So, the bonus shouldn’t be the main focus. It’s just when the chance shows up, maybe we can make the jump faster than other players.
I don’t know if this is an issue but with 2 players, the tension for racing is a bit lower. Mostly because both players can just focus on different rows or objects while with 4 players, they might share the same focus.
I also don’t know why different rows or objects will give different bonuses. Maybe the game wants us to compete on the higher rows?
Physically, building up on the rows in the middle should have similar challenge or difficulty. Since we can only place tiles inwards, the rows on the edge of the board will be more difficult but they should have been the same level of challenge and therefore give the same bonuses.
As it is, focusing on first few rows seems to be the better choice. While I think we have better chance of success with the middle rows than the top row but there is less reason to pursue the bottom one.

Info Card
This is more like a Player Aid Tile. The Info Card or Tile is the biggest brown cardboard tile. It has square shape with 4.5 cm in size. The purpose of this tile is just a setup reminder for different player count.
On the front we have a table with 4 rows. One row for the size of Garden Tiles and the other 3 rows are for 3 different player counts. On the back it will just say HABA, the name of the publisher.
The numbers shown on the tile is the number of Garden tiles that we need to flip from face down pile every round. Basically, we will be using 1 tile per player with the size of 3 of both variants, and 2 tiles with the size of 2 and 1 per player.
The total would be 6 Garden tiles per player per round. While the distributions of different sizes seem to be equal but it doesn’t mean that each player should draw the same set. Players will take turn picking one tile and place them on the board until all of them have taken 6 tiles in a round.
One player can take all of the big size tiles while the other player can take the small one. Of course, that is not the best strategy.
The main consideration would be, how each player develops their board. Is it possible to fit the tile while still following the placement restrictions?
At the start of the game, with empty board, then it is reasonable to just go for the biggest tile. As the game progresses, players may have created their own additional restrictions.
We probably can still use the biggest tile but we need to for a foundation first using the smaller one. Obviously, there is a chance that the opponent can take 2 big tiles first.
While the size variants will be the same from round to round but the objects on the tile will be different and they will come out randomly. Towards the end of the game, always chasing the biggest tile is not always better.
If we can place tiles with the size of 1 on 5th layer, we can get 5 points while the size of 3 on 1st layer will only give 3 points. Even on 2nd layer, the size of 3 is only 6 points.
In fact, if we do very well on building a flexible foundation while the other players fail to do so, we can take the bigger tiles during the last round and score a lot more. It’s amazing that with the same setup each round, the game already has another way to make it tighter.
Based on that setup, with 4 players, we will be using all of the Garden Tiles that come in the box. While with 2 or 3 players, there will be some unused tiles, 24 and 16, respectively.
I’ve only played with 2 and I’ve never felt that I need to count the leftover tiles to predict whether the one I’m looking for will show up. Especially the bigger tiles. Maybe that’s not the case with 4 players as we will use all of them.
I don’t think we need to know that info to play well but with just 4 rounds, maybe it’s not that hard to see.
This Info Card doesn’t say different number of rounds based on different player counts. While each round each player will only play up to 6 tiles, in 2-player variant, each player gets a total of 36 tiles while in 4-player, each player will only get 24 tiles.
With 2 players, because the total used tiles is distributed through 6 rounds, both players will still have almost the same occupied space from their board. One player cannot keep taking the big tiles.
With 4 players, there is more chance for one player taking the other 2 or 3 players bigger tiles. Again, it is not a good strategy during later rounds but I can see that happen in earlier rounds. In that case, maybe we can notice the difference in size of the final board between players.
According to votes on BGG, the best player count for this is 2 but there were only small number of votes. I can see another issue with more players is that every round, each player will see more options.
This can increase the downtime between player’s turn. While we still only pick 6 but the difference of permutation is between 12 variables in 2 players to 24 in 4 per round.
In later rounds, the options will be limited. Not every tile can be placed on the player’s board. The problem would be when we already have a plan but the other player then took the tile, we have no choice but to make another plan. That can make the game longer.
According to some users, with 2 players, they can get 200 points, maybe even 273 without expansion modules. With higher player counts, as each player will play lower number of tiles, lower score per player is to be expected.

Expansion Module Tiles
These are the 5 rectangular tiles with the wooden brown background color, similar to the info cards. They have the same shape and size with 3 x 4.5 cm in size.
This game comes with 5 expansion modules to increase the complexity and difficulty. Players can add them to the base game in any combinations, just use one module or all 5 modules.
These tiles are basically just a reminder for the Scoring Conditions. We won’t use them to the gameplay at all. On the front side, in vertical orientation, all we will see from these tiles are icons that represents how the scoring for that module works and the value for scoring.
All we can find on the back is just logo from HABA, the publisher. The game itself is intended to be a game for family so that adults can play them with younger players.
They can start with just the base game. Then they can slowly add one of these modules until all 5 of them are added. The rule suggests specific order of which module we should integrate first.
Here are the expansion modules and the order to integrate them.
First Module, A Colorful Garden. In general, the garden tiles have green background color which resembles the meadow or just green fields. The other color comes from the different objects on the tile. By using this module, we can get extra score for creating the big group with orthogonally adjacent objects.
If we manage to create multiple groups, we only get score from the largest group based on the number of space, not the number of objects. The bonus score from this module is 1 point per object at the end of the game.
Since the object on each tile has at least one object, with 10 adjacent spaces, we can get at least 10 points. Probably more.
All of the objects will be considered as in adjacent space regardless of different layers they are on. So, it is based on just the view from the top of the player board.
This is interesting because while we can place any tile in the same position and orientation, the position of the objects on that tile can still be different. If it is a tile with a size of 3, the objects can be in the middle or either one of 2 end-spaces.

Second Module, The Big Meadow. This one is actually the opposite of A Colorful Garden Module. Instead of trying to make a large group of adjacent objects, we want to create a large group of adjacent empty green space.
Only the largest group that counts. Each space of that group is worth 2 points. Similar to the first module, it doesn’t matter if the empty spaces are on a different layer. As long as the group is not separated by a space with objects on it.
From these first 2 modules, the gameplay doesn’t change. However, they can affect the decision as how we place the tile. Because we will try to stack tiles up to reach the 5th layer or so, some objects will eventually be covered.
The scoring from these modules only happens and matters at the end. So, for the most part, we will only start to care during the last one or two rounds maybe even the last few turns.
Assuming we use both of them, during the last 2 rounds we will start to focus the area for those 2 parts. One with adjacent objects and the other for the empty space. We just build up our foundations first, and eventually we will see the potential area to keep those 2 groups and expand them to get more score.
We will try to connect two groups with objects so they can be the biggest group. At least, that’s how I play. Maybe a better one can make a plan from the start but I’m not sure.
For the first module, it is also better if we can play the bigger tile on higher layer. The bigger tile will have more objects on it. We need to play them early as well to build the foundation. However, more likely than not, they can be covered subsequently.
By playing them later, they will have more chance to stay visible and give more points.
I think the focus is leaning towards placing the object while the empty space is more like secondary consideration. At least, that’s how I play and probably because of the placement restriction by the row and column that are based on those objects.
However, with 2 points per empty space of the largest group, this can give a lot of score. Especially if we also play with the 4th Module, the 7!, which will limit the number of objects. I think the second module also works well with The Frog, at least for the first few layers as it allows the frog to move.
The first module works well with the majority bonus at the end. Maybe not with the 4th.

Third Module, The Zen Garden. For this one, we will use all of the 16 Zen Tiles. Not only this will add another Scoring condition but it will also affect the gameplay.
The Expansion tile shows a grid of 3 x 3 with the Zen tile in the middle. This represents scoring that will happen around the 8 spaces adjacent, even diagonally from that Zen Tile. Each object, including the one on the Zen tile is worth 1 point.
However, the scoring doesn’t happen at the end of the game. It will happen when the Zen tile is completely surrounded. It doesn’t have to be an object but just tiles.
The way it works is, on our turn, instead of taking the regular Garden tile, we can choose to pick one of the face up Zen tiles. Then, we place them following the same restriction as regular Garden tile.
The Expansion tile doesn’t say but there is another restriction. We cannot take another Zen tile before the previous one is completely surrounded. So, we take a Zen tile, let it be surrounded even by edges of the board, and get the score. Only then, we can start scoring from another Zen tile.
Zen tile also can only be placed as the first layer and we are not allowed to put anything above it subsequently. This has no reminder as well on the Expansion tile.
Since the scoring doesn’t happen at the end, we might still change the surrounding objects after the scoring. During the scoring, the surroundings may have objects on all 8 spaces or none at all. The score from each Zen tile can be from at least 2 points, up to 26 points.
This is the one that I have not played by the correct rules because I assumed that the scoring also happens at the end. So, when it is combined with the other modules, this doesn’t affect the other modules that much with the rule as it is.
I’m personally not sure that making a strategy around the Zen tiles is a good one in this game. We could be sacrificing our effort to build foundation so that more tiles can be stacked on the top.
It will also become extra restrictions later, especially if we place like in the middle of the player board. But still, it can give extra points if we can surround the Zen tile. Placing on the edge, while giving less points potentially, is probably a better way.
An opportunity might come but I’m not sure if we can really make a strategy from the start. More like tactical consideration.
Another thing that, since we can only place it on the first layer, there is a chance that in later rounds, we will find no space to fit those Zen tiles. This can happen to all players and depends on which Zen tile is available at the moment to take.
Also, maybe try to replace the Garden tile with single space instead of the big one when taking this Zen tile.
This Zen Garden Module can significantly change the game. But at the same time, there is a chance we will ignore it.

Fourth Module, The 7!. On the tile, we can see a full grid of 6 x 6 with highlights to one of the rows and columns that each has a total of 7 exact objects.
This one also doesn’t change the gameplay but surely the decision when placing the tile. Unlike the first module, we only count the total in row or column. There is no need for those objects to be adjacent.
If we can get exactly 7 objects on row or column, we get exactly 7 points each. Less or more than 7 objects means no bonus point at all. It can be any combination like 3+3+1, 3+2+2 or 3+2+1+1, 2+2+2+1.
With the way I play, most of the time, this will only affect the last round. We might get lucky and get 7 from one row or column in the round before the last one and try to keep it that way.
The thing is that we don’t know the next tile that will show up. There is also a rule that we have to play a tile if placement is possible. Passing voluntarily is not allowed. So, the chance to get ruined is big if that is not the right tile. The other players might force us to take the bad tile and we lose this bonus.
During the last round, we can still make decision with the last few tiles. Maybe the leftover objects will only affect the row but not the column that we already have 7.
This module can be more interesting when it is combined with 1st or 2nd modules or just the majority at the end. We want to keep the row to 7 objects but we might lose the majority bonus which can give more than 7 points. Or we have to break the group and lose points from either 1st or 2nd module just to get that 7 points.

Fifth Module, The Frog. The Expansion tile will have a giant frog icon and a moving up pattern. Each one step higher will give 1 bonus point higher. This module will give extra action per turn for moving the frog 1 space.
There are a lot of things to remember with the frog movement and the Expansion tile only shows the scoring potential. It doesn’t even show that we get to flip the Frog tile to the Gold side after the 4th layer. From my experience, I have to keep checking the rulebook for this one.
This expansion module introduces a dynamic restriction from the frog. We cannot place any tile where the frog is. The Frog as the Silver one also cannot move through an object and can only move upwards or at the same level.
It is possible that the Frog might get stuck, which will be similar to Zen tiles but at higher layers. This is the only module that will give definitive scores based on how high we can move the Frog. It’s either 1 point, 3 points, 6 points, 10 points or 15 points up to 5th layer.
I assume it can go up to 6th layer and get another 6 points but not sure how likely it can go up. Even placing the 6th layer is already rare. While the restriction is dynamic but we get to decide where and when to move it.
Back to the discussion about the Expansion Tiles, I almost never use it. They are just reminder. I always play using all of the modules. It seems like there could be an interesting setup like use only 3 modules, chosen randomly by shuffling these tiles.
Somehow, I feel like they give us these tiles only because they still have space from the cardboard sheet. While they are nice but I would rather a better player aid for how the expansion works.

Zen Tiles
These are the yellow square tiles, each with a Garden Object on it. The yellow background is supposed to represent a sand with some ripple visual effect.
In Japanese style garden, we often see a feature where there is a big area of sand with an object in the middle of that area. Mostly the object is stone and they will become the vocal point of this landscape design. That feature with a sand area is usually known as Zen Garden.
These 16 Zen Tiles will be used in the game if we want to play with the expansion module #3, the Zen Garden module. On player’s turn, instead of taking a regular tile to place on their board, they can choose to take one of these Zen Tiles.
Placing the Zen tile must follow the placement restriction of a regular Garden tile. However, there are additional rules. One of them is that these tiles can only be placed on the ground level, or lowest layer of the board. So, it’s kind of thematically accurate.
Secondly, players cannot take any other Zen Tiles subsequently unless the Zen tile that is already on the board is completely surrounded, in all 8 adjacent spaces including diagonally. Surrounded means, there is a Garden tile on those 8 adjacent spaces except the edges of the board. In that case only 3 or 4 spaces adjacent to that Zen tile.
Once it is surrounded, we will immediately get bonus score from that Zen Tile. The bonus score is 1 point per object in those 8 adjacent spaces, including the Zen tile itself.
That means, at most, each Zen Tile can give additional 25 points, with 3 from each adjacent space and 1 point from that Zen tile itself. The potential is lower if the Zen tile is placed on the edge of the board.
As the lowest possible score, we will get just 1 point from that Zen tile with no other object from the regular Garden Tile. After taking the bonus, then we can take another Zen tile.
We can only take one Zen tile each time from 5 that are available from the market. Once taken, we have to replenish the market again. So, in every game that use this module, technically, we will be using all of the tiles. It’s just that it is very unlikely that we will use more than 5 in game.

From my experience, I will at most take twice in a game. With 16 tiles, every player can take up to 4 times with 4 players. Not that it has to be distributed equally among players.
Placing a Zen tile is already restricted because of the row and column restriction. Combined with the rule that we need to surround the tile completely before taking another one will limit the chance.
Another difference between placing Zen tiles to regular Garden tile is that we cannot place subsequent tiles on top of the Zen tile. Not only this will limit taking the Zen tile, but it will also limit placing a Regular Garden tile, especially if we place them in the middle of the board.
Because of the restriction, most of the time we will have to wait until we can see, maybe a hole in the middle before we take the appropriate Zen tile. There is a chance that we won’t get that chance at all. Combined with the random order of how those Zen tiles can come out. Other players can also try to prevent us from taking that tile.
Later in the game, we might not get another chance to use the Zen tiles again. Mostly because it has to stay on the bottom while we might try to use that space to build up. The question will be, is it worth to lose the flexibility to build up and get points from Zen tile? It is still possible to build very high around the Zen tile. That object will stay there which can affect the other scoring conditions like majority or if we try to aim 7 total object per row or column.
While this module doesn’t really change the gameplay but it does give more option and things to consider when placing the tile. If we don’t place them carefully, they will become another restriction in later turns.
This also introduces another element of timing because the bonus score happens in the middle of the game after we have enclosed the tile. If we do it well, we can get a lot of points.
Otherwise, we only get very low point and very annoying restriction. Maybe it will be easier to build the enclosure first with a plan to place the Zen tile later in the middle of it. With that idea, if the Zen tile is taken by another player, we can still place the regular Garden tile in that position and potentially build up.
With all of that in mind, usually we will ignore the Zen tiles first. After we know the area to build high, then maybe we can place the Zen tile on different area.
With 16 Zen tiles and 6 different objects, most of them will have 3 copies of the same tile while the two objects from the top and bottom row will only have 2 copies of these tiles. With more players, assuming all of them are using the tile, maybe it is not that difficult to tell whether the tile with an object that we are looking for will come out again.
The size of the tile is about 3 cm. They are supposed to be the same size as the smallest size Garden tiles.


Garden Tiles
Now, we get to the main gameplay component, the Garden Tiles. We will draw them from the market and place the tile onto our board to create the beautiful landscape of Japanese Garden with multiple layers.
These are the polyomino tiles with 3 different sizes and 4 different shapes. The sizes are from just 1 square space or monominoes or size 1, 2 squares or dominoes or size 2, and 3 squares or trominoes or size 3. For the size 3 tiles, they come with 2 variants for shapes, the corner or C shape and straight shape.
Different variants also use different colors on the back, along with identical abstract patterns. The size one has yellow color, purple for size 2, red for the C-shape size 3, and green for straight shape size 3.
The length of physical size of these tiles will be the increments of 3 x 3 cm for each space.
Each Garden Tile will also have one type of 6 different Garden Objects. Depending on the row position of that object on player’s board, the number of tiles will have 2 different sets. One set for the middle row (Pagoda, Azalea Bush, Fishpond and Boxwood), and the other for edge row (Maple Tree and Stone). Here are the details.
Tiles from Middle Rows: 5 tiles of size 1, 5 tiles of size 2, 3 tiles of straight size 3, and 3 tiles of the C-shape size 3. For the row on the edges: 6 tiles for size 1, 6 tiles for size 2, 2 tiles for straight shape size 3 and 2 tiles for c-shape size 3.
Each straight shape size 3 also has 2 variants for where the objects will be depicted. For objects on the middle row, they have 2 straight size 3 tiles with object in the middle and 1 tile where the object is at the corner.
The size of the tile also represents the number of objects printed on the tile. Size 2 will have 2 objects and 3 objects with size 3. This matters for scoring after each placement and for the majority bonus.


As mentioned on the INFO CARD section above, depending on the player count, we will use all 96 tiles or less for lower player counts. Each round a number of tiles will be revealed and players will draw from that pool.
The number is using the same formula. For each player, we reveal 2 tiles for size 1, 2 tiles for size 2, 1 tile for each shape with size 3. So, each player can take up to 6 tiles each round.
We reveal them randomly. So, in one round, we can have all objects on the tile while in another round, maybe we miss one type.
In this game, taking the big one and place them on the board is easier in earlier rounds. However, we want to place them on higher level to get more score. The score we can get is the number of objects on that tile times the number of which layers it is placed on.
For an example, if we can place a size of 3 tile on 4th layer, we can get 12 points while on 1st layer, the same size tile will only give us 3 points. The challenge is that to place the tile on higher layer, we first need to build the foundation first. That is because, we cannot place the tile hanging on higher layer.
We will want to try to create an area big enough as foundation so that any shape and sizes can fit on top of it. Of course, eventually, the higher area will be smaller than the lower one just like a shape of a hill.
Based on the different number of tiles for each Garden Object, I can understand that those on the middle rows and on the edge of the board should be different. The one on the edge can only be placed inwards while those on the middle rows can go in either direction.
Maybe they can even make it more gradually as the exact middle rows is still easier than the second row from either edge. As it is, they just make them into 2 groups which is easier to remember. Even though I’m not sure if we should memorize the number of tiles to play the game well.
While the tiles have colors for the green empty space and Garden objects, the colors are not as striking as the colors depicted on the box cover. Instead, the tile looks pale. Some people felt a bit disappointed in that. Even I felt that way.
On the other hand, I kind of understand these 2-contrasting color palettes. I feel like some Japanese artforms have this. Like between their anime and manga or between their natural tourism spots and their city. One is very colorful while the other is not.
I could be wrong but that’s my limited observation. Also, I don’t know if that is the actual art direction that the developer of this game is trying to make.
Since we are going to stack these tiles in the game, one issue that we may find is telling on which level or layer that the tile is on. This is important for scoring.
While the top side of the tile has color, the side that shows the thickness is a bit dark, with gray color from the cardboard. The 3-dimensional aspect and with a backlight, it makes it more difficult to tell.
This is a minor issue as we can just take time figuring them out. If we really create different layers gradually, we can count each step up. What makes it harder is if we build on the bottom rows which is closer to the player, we probably won’t be able to tell just by looking since we will look from right above the board.
So, we kind of have to tilt our head, to see from the side. For me, I will just use my finger to feel and move it up by following the layers to count. The problem with that would be bumping to some hills or higher-level stack.
While the rule says that we cannot place the tile hanging so that the occupied space will have a tile below it, it doesn’t mean that they are a rigid structure. They can still slide to an empty space with just small force or even push a smaller piece.
Again, it’s not a big deal. So far, from my experience, it is not that hard to fix them if they get bumped. Unless somebody accidentally throw something from the side, which is like flipping a table, it is not going to be that mess.
The different colors on the back of each different shape of tile is very helpful when putting the game back to the box. At least for those who want to keep them sorted. After all, the box is big enough to just throw them away.


Score Board
The Score Board is the biggest cardboard component in this game with 27.5 x 13.5 cm in size. It comes as part of the punchboard sheet. Because it’s too big, it will fall off the sheet without the need to punch it out. On the back it also uses abstract patter with teal color.
As the name suggests, the purpose of this board is to track scoring. The scoring track in snake pattern with stone steps art, that will only go up to 50 points. However, the bottom of the board has another one to track every 50 points that we got.
On these 2 tracks, each player will place their 2 Scoring Stones or cubes. The snake track actually doesn’t have 0 space. So, at the start of the game, all cubes will be placed outside the board.
It is kind of weird but in this game, we will immediately gain score after the first turn. So, it’s not really a big deal. It’s just we need extra space on the table.
Every 5 points, the track will use darker color on the stone steps. Actually, the number is only every 5 points not all, of them. Next to every U-turn of this snake pattern track, there is an arrow to remind us about the direction where the cube should go.
While we can actually just look at the next 5 points before moving the cube, there was one time when I moved the cube to the opposite direction. That happened when the cube is in the middle part, not the U-turn.
The problem is that the number every 5 could have been covered by the opponent’s cube. Every score space is about 2 x 2 cm. Some will be smaller. If the cube is exactly 1 cm, then, the space itself is barely fit those cubes.
Of course, not every turn two or more cubes will be in the same space but even with just 2 of them, they can cover the next number. With more players, maybe one can notice if somebody is moving the cube in wrong direction and tell that player.
At the same time, this is also a multiplayer solitaire game where each player will focus on their own board. They may not care about the other player’s score, at least during the game. Especially if that player who made the mistake was in the last position.
In this game, the score of one player can go way higher at certain point. That, of course, doesn’t mean that the player is going to win. It’s just that they get bonus score early but other players can do it as well and eventually catch up.
It is possible that two cubes can actually catch up even if one of them has passed the 50-point mark while the other hasn’t. Maybe if the losing one is playing poorly.
In earlier rounds of this game, we only get very low score every turn. But later, as we probably have built some layers onto our board, with the size 3 tiles, we can probably get around 10 points per tile. We will see a huge jump within just 1 round during final round.
If the player notices the mistake rather soon like within one or two turns after, maybe it’s not that hard to fix them. It will be more difficult if it happens like one round before. As we are stacking tiles, even one turn after, the previous tiles will be covered by possibly more than 1 layers. There is no way to keep the track.
It is also possible that one player did make a mistake and move the cube backwards but immediately move the subsequent turns in the right direction. I don’t know how significant it will affect who is winning.
A lot of people have said the downside of using snake pattern track. Maybe it’s better to just one direction and it doesn’t have to be continuous track. they can break down like every 5 or 10 points but always from left to right, instead of just from 50 back to 0 as it is.
Aesthetically, of course, the snake pattern gives a better look. Then again, once we get used with the game, this is a minor issue.
As I have mentioned previously, somebody said that reaching 200 points in 2-player game is very common even without bonus points from expansions. At least 150 is a reasonable score. I assume with more players and a smaller number of tiles to play per player, the score will be lower.
At least that 150 – 200 is a good benchmark. It’s more about each player’s achievement. This will not help fix the scoring mistake for moving the cube in wrong direction.
I don’t know if that is the reason why the 50s track has a bigger space for the 200 points. Each space with bigger value is gradually bigger and it’s like 200 is the top and moving downwards again with 250.
With those 2 tracks as they are, the maximum score to keep track can go up to 300, which is 250 plus another 50. I think I did get 250 one time but nowhere near 300 and that is with 2 players and all of the expansion modules.


Round Track
At the top, we can find a ROUND TRACK in the form of stone steps on a garden pond. On this round track, we should be placing the circular red round marker and move it from one space to another every new round.
The number goes up to 6 that indicates up to 6 rounds. Above the number 4 to 6 we can see dots that represents the number of players. As we can see, for 4 players, the round only goes up to 4 rounds, 5 rounds for 3 and 6 rounds for 2.
Between 4 – 5 and 5 – 6, there is additional stones in the pond to tell the subtle threshold. I don’t know why only 6 has the black color. If it is just a reminder that it will be the last round but only if we play with 2.
I already mentioned in the section about Round Marker, the dots above the round 4 to 6 spaces will be covered by the marker. What we can see through the hole will be the round space.
Before moving the marker, players have to check the dots first and remind the group that it will be the final round. I personally prefer using the unused lantern piece for another player as the marker.
This way, we can still see the dots, and the market itself is visible by any players. If we use the actual round marker, we probably need to look the round number from the top view. Of course, it is not a big deal.

Garden Boards
These are the last component of Miyabi board game that I will discuss. The Garden Boards are player boards. Each player will take one and build their garden by laying tiles on these board.
It’s not technically a board as it is not made of cardboard. They are more like thick art paper. The game comes with 4 identical sheets of these to support 4 players in a sealed plastic bag. They only use one side while the other side only shows the same abstract pattern with white background color.
This player board has brown color on the front. The size is about 24 x 21 cm.
As we can see, there are 3 parts of this board. On the left end, we can see a column with 6 rows, each with one different Garden object on it. Within each row, there are 2 numbers with one number is double or more than the other.
Right next to it, we can see a grid of 6 x 6. We can see the dotted lines to divide the 36 spaces. Beside that, we can see some red lines that almost make enclosed loops with the smallest one at row 4 column 4 and the bigger ones surrounding each other.
These looks like a technical drawing of a landscape contour level. Each enclosed loop represents the same elevation of the ground. Usually, in technical drawing, they should put the elevation level inside the loop and the smallest one is the top of the hill.
Of course, this serves more like a flavor and doesn’t affect the gameplay at all. Notice that the border lines of these grids don’t use straight lines and they don’t actually end where the lines are crossing. Even still we can see that these random lines are creating the frame as intended.

This is actually what we see from a hand-drawn sketch in architectural drawing during the preliminary design phase. They still follow the frame of from technical drawings but this drawing style is more like presentation of an idea to the client rather than for the contractor to build. So, it’s not about accuracy but more about aesthetic.
We can say that, in this game, we are designing a landscape on a blueprint.
The last part of this Garden Board is the six rectangular shapes at the topmost row. These are where we will be placing the lantern tokens. Each rectangular shape is a marker space of that column.
In this game, we are going to place the Garden tiles on this sheet. Each tile will have an object printed in one of the depicted spaces. We can only place that tile in a manner so that the part with the object is in the column without the lantern.
Then, we place the lantern in the rectangular lantern box to indicates that the column has been taken for that round. In subsequent turns, we need to place the tile on different column that still has not any lantern.
With 6 lantern marker boxes, we can place up to 6 tiles every round. They will reset for the next round. The size of each rectangular box is about 2 x 1 cm. It is big enough compared to the footprint of the lantern itself. So, we won’t get mixed with the column that has or hasn’t been taken.
Players can of course, forget to mark the column by placing their lantern. But player’s turn is not done simultaneously. So, the next player can try to remind the previous player to place the lantern before they take their action.
With the way the lantern placement works, we need an area on the table above this board to place the 6 lanterns before we are taking the columns. Instead of placing the lantern standing either on or off the box, we can also just lay the lantern down as indicator that the column hasn’t been taken.
Some people have expressed their disappointment that this Garden board is just a paper instead of an actual cardboard. According to a different user, this is a conscious design choice.
We are supposed to bend or curve the paper to tilt the structure of tiles above it back to the box. So, the flimsiness of the paper actually helps.
While I kind of agree with the bending to flip the tiles but not sure about just throwing away to the box. Usually, I will sort them out by shapes. But flipping the tiles will make it easier to separate them by color.
Some even consider laminating the board or print them on thicker material. For laminating, the board might become bigger than the box. I personally don’t mind as it is but my concern is more about the durability. Paper might get folded accidentally.

Garden Rows and Majority Bonuses
The grid on this Garden Board has 6 rows, each with one specific Garden object on it. What this means is that each row can only be occupied by tiles with the corresponding object. To be more specific, we have to place the part of Garden tile where the object is printed on the row for that object.
For a tile with size 1, it is very obvious as the tile must be on that row. This is different for the bigger size. The size 2 might have one more space that doesn’t have that object and can occupy the other row.
For the most part, there are 4 possibilities but for space on the edge of the grid, the possibilities are down to either 3 or even 2 for the corners. As for size 3 with the C-shape, the object is always printed in the middle space of the tile.
Similar to size 2, for the most part, there are 4 ways to place this tile on the grid. However, for the space on the edge of the grid, there are only 2 ways or even 1 for the corner.
For the straight shape size 3, there are 2 variants of tiles for each object. Either the object is in the middle space of the tile or on one of the edges. For those with objects in the middle, we can place them in 2 ways in most spaces of the Garden Board. But for the edge of the grid, there is only one way to place them. We cannot place the part where the object is printed at any of 4 corners.
For the variants where the objects are at the end, these are probably the least flexible tiles to place. If we place them inwards, they are almost like the size 2.
For objects on 1st, 2nd, 5th and 6th rows, the 1st, 2nd, 5th and 6th column will have 2 possible ways to place the tile. The 3rd and 4th column may have 3 possibilities. As for objects on 3rd and 4th rows, the possible placements can be about 3 or 4 ways.
As I already said above that the two on the edges will be more challenging while the two in the middle rows are probably the easiest.
The thing is that each row can give different majority bonuses. At the end of the game, players will compare each row of their landscape to find out whose garden has the most object.
Here is the detail for each 1st and 2nd place majority bonuses.
Maple Tree (1st Row): 15 and 7 points.
Pagoda (2nd Row): 12 and 6 points.
Fishpond (3rd Row): 9 and 4 points.
Azalea Bush (4th Row): 8 and 4 points.
Boxwood (5th row): 7 and 3 points.
Stone (6th row): 6 and 3 points.
Based on the difficulty to place the tile, the 1st and 6th row should give the same number of points. The similar goes with between 2nd and 5th or between 3rd and 4th row.
As it is, 1st, 2nd and 3rd are bigger than their similar counterpart. It’s like the game encourages us to pursue the top most row instead of equally to both ends.
In 2-player game, if one player focuses on the first 3 rows while the other player focuses on the second 3 rows, there is a good chance that the first player will get more bonus. Even if both win their own area equally.
For example, first player wins on Maple Tree row and gain 15 points while giving the second player 7 points. On the other hand, the second player wins the majority of 6th row and gain only another 7 points and giving the opponent 3. In that case, the first player is already 12 points ahead of the second player.
Combined with also the 5th layer bonus from the top rows that also give higher than the bottom rows, it will give more advantage for the first player. So, there is no reason not to compete on the higher rows.
On the other hand, successfully reaching to the 5th layer doesn’t necessarily mean we will win the majority of the same row. Sometimes we have to cover the object on lower layer in order to place the next tile above it.

Another thing is that even if we do focus on specific rows, it doesn’t mean that the next tiles to show up will be for the chosen rows. We might get stuck and never get any tile for that row until the game ends.
So, we still have to diversify a bit. Maybe focus on 2 or 3 objects. But the issue remains the same. Going for the higher rows is probably a better choice. Maybe the better idea is to split up based on columns.
Instead of diversifying or expanding the landscape from left to right or vice versa, we can choose to go top to bottom. The challenge is that we still need place only one tile from left column to right or vice versa.
With that idea, the landscape will grow diagonally. From that, we can then expand the foundation. Maybe that should be the best strategy. That is if we try to win all of the majority bonuses, which is almost never happen. We can choose to just let the opponent win that row.
The highest possible number of objects per row should be 3 objects times 6 or 18. Usually, I can get like 10 or less per row, especially if we try to win from the 7! module.
Most of the time, we will even forget to aim for as many objects as we can. Our main focus would be just trying to fit any available tile to the board. We will start to pay attention maybe during the final round or the last couple of turns.
Some people also criticized that from these majority bonuses, in 2-player mode, the losing one will still get the lower bonus. That is even if the player has 0 object for that row.
In other game like Coimbra, they may add extra requirement in order for the losing player to win that lower bonus. That is by still having some objects but within certain range of number from the winning player.
While it’s weird to gain any points without trying to do anything. However, in this game, focusing on certain rows can end up losing the objects because the objects might get covered by another tile.
I think the better solution for 2 players is just to ignore that scoring. Maybe it also works by just giving bonus to the first place. From my experience where the 2 players split up, one got 32 (+12) points while the other got 25 (+15) points.
The first player won the majority from 1st, 3rd and 4th row while the second player won the remaining. Somehow, the score from being the second place actually helped catching up if both win rows equally. If only one player manages to win all 1st places, then the bonus becomes more significant.
Regarding winning the majority by having more visible objects, it is actually easier to do so on the lowest layer that we didn’t focus on at first. We will have more control of what’s visible and not.
That is all of the components to play Miyabi, the board game. Now, we can learn how to play the game using these components.
How to Play
Miyabi is a competitive game for 2 – 4 players. Regardless of the player count, the game remains the same. The only difference is that we will be using different number of Garden tiles for different number of rounds.
The base game also comes with 5 expansion modules that we can integrate however we want. Three of those modules add only different scoring conditions while the other 2 will use additional components that can affect the gameplay.
There is no official solo variant but there are a couple of fan made variants that we can find from here and here. This next video is a playthrough video with tutorial by Monique and Naveen from Before You Play channel for Miyabi.
Setup
1st. Place the SCORE BOARD at the center of the table. Put the ROUND MARKER on the number 1 space of the ROUND TRACK.
2nd. Each player takes one GARDEN GAME BOARD and place the board face up in front of them. We might want to leave some area above the board to place the lantern.
3rd. Each player takes 6 LANTERNS and 2 SCORING STONE CUBES of one color of their choice. Then, place the lantern on the empty space above the Garden Board, one on each column of the grid.
Place one cube next to the first space of the main scoring track and place the other cube on the 0 field of the 50-point steps track. That means the first cube should start off the board.
We can return the unused game board, cubes and lanterns back to the box.
4th. Place all the 6 BONUS TILES at the center of the table face up. Players will be competing to be the first to take any of these.
5th. Keep the INFO CARD nearby. This will tell us the number of Garden Tiles that we have to reveal every round for each player count.
6th. Place all of the 96 GARDEN TILES face down. The rule suggests using the box lid to place them. Take the corresponding Garden tiles from the box lid and place them face up on the table.
The formula is 6 tiles per player with 1 straight shape size 3 (green), 1 C-shape size 3 (Red), 2 size 2 tiles (purple) and 2 size-1 tiles (yellow).
7th. Assemble the BONSAI TREE and give it to the chosen first player. The rule suggests the youngest one to go first.
8th. Optional, specifically when using Zen Garden Module. Place all 16 ZEN TILES face down on the table. Reveal, 5 random Zen tiles and place them face up on the table where every player can reach.
9th. Optional, specifically when using The Frog Module. Each player takes one FROG TOKEN and place the token anywhere on the game board grid with the Silver Frog side or the smaller Frog side face up.
10th. Optional for the Expansion Modules. Place the chosen EXPANSION TILES on the table as a reminder for scoring later. We can return the unused module tile back to the box.
That is the setup for any player count and we are ready to start the game.

Gameplay
The game of Miyabi is played over 4 rounds for 4 players, 5 rounds for 3 and 6 rounds for 2 players. Players will take turns choosing one of the face up Garden Tiles and place them on their board, starting with the player with the Bonsai Tree.
Each round, players can take up to 6 tiles. However, if they cannot place any leftover tiles, they must pass and they will not take any tile again for the rest of the round. If they can place any tile, then they must do it.
After every placement, player will gain score and move the Scoring Stone Cube on the scoring track accordingly. So, on player’s turn, they need to resolve 3 steps or more with expansion modules.
Optional 1. Move the Frog Token + Scoring. Only once per turn.
One. Take and place a Garden Tile or Zen Tile. Or PASS.
Two. Place a Lantern. If player didn’t pass during Step 1.
Optional 2. Move the Frog Token + Scoring. Only once per turn, if it is not done before step 1.
Three. Scoring after placing a tile and/or moving the Frog to higher layer.
Once the round is over, unless it was the final round, reveal a new set of tiles to prepare for the next round. Otherwise, the game is over and players proceed to the Final Scoring phase. Whoever score the most points, wins.
Moving the Frog Token (Optional)
If we play with the Frog Module, before or after the regular turns with taking a tile and place it on the board, we may move the Frog token on our board. The Frog can only move one space horizontally or one layer higher vertically onto orthogonally adjacent space.
If the Frog moves to a higher space, the player will immediately gain points. The number of points is equal to which layer the Frog is landed on. So, for layer 1, gain 1 point, 2 points for layer 2, and so on. Move the Scoring Stone cube accordingly.
Since the Frog is not allowed to move to lower layer, landing on higher layer will happen only once per layer. Therefore, that bonus points also happen once per layer.
The second restriction is that the Silver Frog cannot move to a space with a Garden object on it. When the Silver Frog reaches the 4th layer, it turns into a Golden Frog. We can flip the Frog token for this transformation.
The Golden Frog can then move onto objects but still only upwards or on the same layer.
Take and Place a Garden Tile or PASS
On their turn, players can take any 1 of the face up Garden Tiles. They then have to place the tile onto their board, within the grid, by following these placement rules.
One. The part where the objects are printed on the tile must be placed in the corresponding row as shown by the left side of the Garden Board.
Two. Players can only place the part with objects on the tile to the column that still has no lantern at the top.
Three. The green empty space can go in any empty row or column. It doesn’t matter if the column is empty or already has a lantern on it for that green empty space.
Four. The Garden tile must be placed within the 6×6 grid. It must not extend beyond the grid.
Five. Garden Tiles may be placed on top of other previously placed Garden tiles. But only if the entire new tile is on top of previously placed tiles.
Objects from other Garden Tiles may be covered. This does not apply to ZEN TILES. Placement on the higher layer must still follow the row and column restriction.
If any player cannot place any leftover tile onto their board, they must pass for the rest of the round while other players continue playing. This means the player who passed will skip scoring and placing lantern.
Players are not allowed to pass by choice. If they can place any tile, they must do it. The idea is so players must consider not just the next tile to take but also the other leftover tiles.
NOTE FOR ZEN TILES. Players can take one of the face-up Zen Tiles instead of the regular Garden Tile. The same placement rules with the row and column apply for these.
However, in addition to that, we can only place Zen Tiles on the lowest layer or right on the board, not on top of other tiles. After placing a Zen tile to their board, that Zen tile must be completely surrounded by other tiles in all 8 directions and edge of the board before the player can take another Zen tile.
If any player takes a Zen tile, we reveal a new one immediately so that the next player will have 5 choices again. Unless there is no more face down Zen tile to be revealed.
Place a Lantern
After placing a Garden Tile, place the lantern on the lantern field of the corresponding column. The corresponding column is based on where the objects are placed on the grid not the empty space of the tile.

Scoring
Players immediately gain points after placing a Garden tile or Zen Tile onto their board. The number of points is equal to the number of depicted objects from the tile times the layer on which the player placed the tile.
Remember that the number of objects on the tile is aligned with the size of that tile. So, the size 3 tile will have 3 objects depicted on it. If we place the size 3 on layer 3, we will get 9 points.
Everytime the Scoring stone passes the 50-point mark, move the Stone on the 50-point step one space. Then, the Stone on the Scoring track will continue back from the 1st space again.
Note on Zen Tiles
Zen tile can be considered as just size 1 Garden tile. Since, we can only place them on the lowest level, that will give us just 1 point.
However, once the Zen tile is completely surrounded, the scoring for the Zen tile happens. The points from a Zen tile are equal to 1 point per each object adjacent to that Zen tile in up to 8 directions. The player will also receive one additional point from that Zen tile when it is completely surrounded.
With that, the scoring potential from a Zen tile is between 1 up to 25 points. One point if there is no other adjacent object and up to 25 if all 8 adjacent spaces have 3 objects each.
If we also play with the Frog module, the objects below the Frog still count for scoring the Zen tile as if there is no Frog on it.
After the player has received the score, the Zen tile can no longer be used to gain score again.
End of the Round
The current round ends after either all the lantern fields have been filled or all players have passed. At that point, we remove any leftover Garden tiles from the game.
We have to move the ROUND MARKER one space and prepare for the next round. For that, we have to remove all of the lanterns from the fields and reveal the new set of Garden tiles again.
We pass the Bonsai Tree token to the next player, making them the start player of the next round. Then, we are ready to start a new round.
If the current round is the final round, instead of preparing for the new rounds, players proceed to scoring phase.

End Game and Scoring
The game ends after the last building round and then players proceed to Final scoring. During this phase, players will gain points from majority of each row and from the 3 expansion modules if they included any of them.
For the Row Majority Bonus, points are given to the player who has the most objects of each row. Each row is scored individually. They will give different bonus points. There are two numbers printed on the Garden board on each row, one for the player who has the most objects and the other for player with the second most.
The winners of each row then move the Scoring Stones on Score Board accordingly. All other players receive no bonus points.
If there is a tie for the most objects, all tied players will receive the highest bonus. In this case, no points will be awarded to the player(s) with the second most object.
If the tie is for the second most object, then all tied players will receive the lower bonus. This applies to any player count. So, in 2-player mode, both players will receive the bonus even if player at the second place has no visible object at all for that row.
For the Colorful Garden Module scoring, each player will gain score from their largest connected group of orthogonally adjacent objects. It doesn’t matter if the objects are on different layers but empty green space will break the connection.
Players will receive 1 point per object in this group. Move the Scoring Stone accordingly.
For the Big Meadow module scoring, each player will gain points from the largest connected group orthogonally of empty green spaces that have no objects in it. Different layers do not break the group, only objects.
Players will receive 2 points per empty space in this group. Move the Scoring Stone accordingly.
For the Zen Garden module, the scoring happens during the game not in this final scoring phase. Players must completely surround the Zen tile to trigger the scoring after placing the last enclosing tile.
For the 7! Module, players will gain extra points from each row and column if the total objects on that row or column is exactly 7.
Players will gain exactly 7 points from each row or column. We need to count all 6 rows and all 6 columns individually. Move the Scoring Stone accordingly.
For the Frog Module, the scoring also happens during the game not in this final scoring phase. Everytime player moves the Frog to a higher layer, they will gain score immediately.
Players count their scores from all of these bonuses. Whoever has the most points wins. Tied player shared their victory.
That is it with how to play Miyabi board game.

My Experience & Thoughts
First off, I’ve only played this using the setup for 2 players but alone. I just take turns playing both sides until the game ends and see which side is the winner. So, my experience is not exactly what other people will get by playing with another person.
With the way I play, one side will always go for the top rows while the other will go for the lower ones. If there is none, then each side will just take the next closest thing. So, there is not much competition in that. I want to say that it can also happen in the real game. That might be true if I don’t really care about the scoring.
Sometimes I do think that there is a potential to hate drafting. I know which tile will be good for the other side and that might be the only one that will work. But I let the other side have that just to see how well the other side will do.
In theory, the side that goes to the top rows should get better score if they both played well. Mostly because of the Majority bonus and the 5th layer bonuses.
However, from my experience, that is not always the case. The side that went for the bottom rows still can win. Even if that side lost, it was still within 10 to 20 points or so, unless it played poorly. Again, this is from not the ideal way to play this game but maybe there is a reason for that.
First, just because one side starts on the top rows, it doesn’t mean that they can always go there. The big tiles for those rows may not show up in the right time. Eventually any player will still have to diversify a bit.
Even in my plays both sides have focus, they have never reached higher than 5th layer. Sometimes because the tile didn’t show up, they only reached the 4th. Or maybe they did show up but the size and shape didn’t work.
From my plays, somehow, both sides have rarely reached the 5th of the row on the edge, either the Maple Tree or the Stone. It is easier to reach the 5th layer on the second row from the edge, the Pagoda or the Boxwood.
I think it’s reasonable, because the edges are just less flexible. That means between both players the gap from those bonuses is not as big as it looks. Maybe even one side of the top rows failed to even gain that bonus.
While any side from my play can still reach the 5th layer of the third row from their edges, it is very unlikely to reach the 5th layer from other row more than that. Most of the time, any 2 players, each will only get one bonus from 5th layer if any.
As for the Majority Bonus, this is an interesting one. While we may not have focus on certain row, we can still win the majority of that row. Because it doesn’t matter if they are just from one layer. At the same time, the side that managed to focus on that row may have covered some of their objects.
With the way I play, one side may not win the majority of the row from the other end. But they can still win the majority of the second or third row from that end. So, it’s not like the side will take all of the higher bonuses.
I think more players will make the majority bonus more interesting. But even with 2, sometimes it’s kind of hard to tell if both players are working on the same row.
At least, from my experience, with 2 players, it doesn’t matter where we start. It doesn’t even matter if we take the lower rows. I thought it’s weird that the scoring favors the top rows but with all of the restrictions, maybe it scales pretty well.
While there is definitely some potential player interaction with the drafting, and even hate drafting, I rarely think it will give a lot of benefit for doing so. The challenge and puzzle from how we place the tile on our board will become the limit.
Trying to mess with the other player’s progress will just ruin the placement on our board which can affect subsequent turns. Of course, we still need to consider the leftover tiles and maybe come up with another plan should the opponent take the tile that we want.
Actually, with the rule that if we cannot place any tile, we are basically out of the round, it is a potential to be mean to the other player and force them out. While it may ruin our own progress a bit but with 2 players, in a game where every turn we gain points, not being able to do anything even just one turn hurts.
Of course, that is mostly the other player’s fault for putting themselves in that situation. This is a risk of not building a foundation or wider connected area on lower layer. If it’s combined with focus row and an area with varying levels adjacent to each other, the other player can just force us to take a tile that might not work for us. Especially the big one.
I don’t know how viable this idea is but it can work towards the end. We can just take all of the smaller pieces early. The opponent might get a lot of score with the bigger tiles but only if they can place them. If not, they are out of the round.
As for the strategy, we definitely have to spend the first few rounds to lay down very wide foundations. Probably like 3×3 areas is the minimum. Instead of trying to score higher by immediately build upwards, we take just 1x multiplier by laying on the lowest layer.
This will give a lot of flexibilities in subsequent rounds. In 2 player mode, maybe we will try to reach our to the top during 5th or 6th rounds. Somehow from my experience, if I manage to reach 5th layer earlier than that like in 4th rounds, the that particular hill was kind of stuck. Not always but it feels like that.
Especially if we also play with the Frog. We might flip that frog so it can move onto objects but it will still get in the way for future tile placement. It’s good if we can hold moving the frog but usually it will go up immediately unless we are building the foundations.
I feel like we will always want the Frog to stay close to the wherever the hills will be. Maybe it’s because it is not easy to tell how many steps that the Frog needs if we just ignore it for a while. By having the Frog stay close, for me, I can visualize it better.
Also, somehow when I changed my strategy from just reaching higher as soon as possible to build foundation first, somehow I can get more visible objects at the end. It’s not like I consciously chose to do so except the last few turns.
Building foundation for me, usually means just accepting that those objects on lower layers will be covered. What I do usually is just trying to place the tile close to the previous one to make a bigger area. Where to place the object part is just to follow the restriction.
This also applies for the higher layer by placing and orienting the tile close to the edge and expand it while still leaving enough area for placement. We do not place the tile in the middle of nowhere.
That Zen Garden module can kind of change the strategy, should we choose to play it. We need to score immediately for that so, we have to mindfully think how to get more objects around it, ignoring what will happen later.
Related to Zen Garden, it’s not a good idea to create that Zen part in the same row where we try to reach the highest point. It is much easier to gain score later.
We will still get roughly the same score potential. But if we do it too early, we are sacrificing our flexibility. The challenge would be whether the Zen tile with certain objects will still be available at the right moment.
For the first 2 expansion modules, as I said above, most of the time, we will only care about them probably on the last few turns. If we still trying to do something like reaching the 5th layer, I find it very hard trying to keep them together.
At the same time, we can start considering those bonuses when the tile just doesn’t work helping us to reach higher. It’s like an opportunity to switch.
Between those first 2 modules, it’s like we have to choose one over the other which is easier. The thing is, we just need to make the area with objects or just the empty green space connected. It doesn’t have to be a wide area. From one experience, the end result can look like an alley, connecting one side of the board to another. Maybe even make a snake pattern.
For the most part, it’s a switch of strategy towards the end. We will just place the tile slightly differently, probably rotate them so it won’t break any group.
As for the 7! module, most of my play were just waiting to be lucky. Maybe we can try to gain one row or column with 7 objects but it may as well ruin the other part.
It’s more like seeing a potential from the end result of our other effort. Maybe there is a row and column with almost 7 objects, either more or less. We can just change it by one play of tile.
Sometimes we just don’t have access to change the other part. Either because no tile with the right object or the column has been taken. We might have more control and better chance for completing a row with 7 objects than the column.
When trying to do combos, like next turn we place the next tile right on the most recent tile, the first beginner mistake is probably trying to do in the same column. Of course, it is illegal but sometimes those are the 2 tiles that just show up and we immediately think it can work.
So, we place the lower one first, then only realize when trying to place the next one above it. In 2-player game, we only need to wait for one player and maybe it is not that difficult to take back. I can see that with more players, it can feel worse. But maybe we can see more tiles and that can give more flexibility.
So, if we want to do combos like that to reach higher in the same round, we can only do it in the same. Usually the size 3 straight tile, if we place within the column can lead us to that mistake.
I want to point out that with the placement restriction, there was one play when I placed the object on the wrong row. The mistake was I got mixed between Boxwood and Azalea. I didn’t look at the leftmost column but instead I looked at the previous tiles on that row. So, one mistake can lead to another.
I don’t remember exactly, but I only realized after several turns, probably in the next round. In that particular case, it is almost impossible to fix it, especially with tiles already above them.
Not only it will affect the score but it will also affect the subsequent placement. There is a chance that the tile that was already on top can no longer be placed there if we try to fix what’s at the bottom. I guess, with tiles and objects can get buried under different tiles, there might be a potential of cheating.
This is definitely less of a problem if the other players will just pay attention while waiting for the active player to finish their turn. The other players can remind the active one if they make a mistake.
But the problem is, that in this game, we need to make a have a second plan if somehow the opponent took the next tile that might perfectly work for us. In that case, the other player will not pay attention but instead trying to come up with a solution to place the remaining available tiles.
With that being said, from my experience, this is less of a problem after playing the game more.
Usually, I will say that the best thing about tile laying games is that we can just try laying the tile and see if that can fit to our board and progress. But the building upwards and column restriction will make it more challenging for doing so.
Of course, trying the tile out is like telling the other players what we are trying to do and what we can do.
Early in the game, we definitely want to take all the big tiles first. Obviously, we don’t want the other players from taking our share of those big tiles. Bigger tiles will cover more space and can help make the foundation faster. The smaller ones work more like a patch.
In later rounds, maybe we don’t always have to take the big one early. For one, the opponent might not be able to place them. If we also cannot place them high enough, then it’s probably not worth it. Size 3 on lowest layer is just 3 points while size 1 on 4 or 5 can give higher score.
I still think that there is a luck factor for the order of how the tile will come out but very minor. From all of my plays with just 2 players, there was one time, probably in final round where almost all tiles have the same object.
One player cannot use most of them and the other player don’t get many score from that object. The other player cannot go high as they have to be placed on different columns. So, it’s a bit anticlimactic.
Again, that’s just one time. Maybe if that happens again, players can just agree to draw a new set.
With all of that in mind, I really enjoy playing this game even though I probably don’t play as how the game is intended to be played. The spatial puzzle to build upwards and restriction from rows and columns make it an interesting challenge for someone who loves that aspect.
I can see some people might have much harder time visualizing how they can place those tiles. The rule is very simple but the gameplay is not as easy as it seems to be.


:strip_icc()/pic9639732.jpg)
Session Reports and Pictures
Usually, I share a session report of playing a game on BGG. Here are the links of each session for this game.
I also put turn-by-turn pictures of a session and unboxing pictures for every game on my collection that anybody can find on my Instagram. For this game, search for #MiyabiAtHomeOfMark on IG for all of the sessions.
Also, check out my blog on BGG. I occasionally write a detailed session report / written playthrough for a game that I’ve played. In each, I will explain the decision process during the game every turn.
June 2026 session and more pictures of that session on Instagram, Tumblr and TikTok. Still the same2-handed setup, using all modules. Second player won with 299 points while 1st player only got 270.
First player got to the 5th layer for Blue and Red row while the 2nd player got to 5th for the ponds and bush row. For the majority, first player won most objects for tree and bush while 2nd player won the rest. Second player also completed 2 Zen tiles while 1st failed to score the 2nd.
Second player also scored a lot more for the connected object module and the empty area module. Got 28 objects connected and 7 spaces of empty area. Also scored 3 rows and columns with 7 objects while 1st player only got 1.
Before scoring at the end of the game, 1st player was at 198 while 2nd had 194. So, by winning from a lot of modules 2nd created bigger gap in final score.
Playing time was about 79 minutes.
October 2025 session and more pictures of that session on Instagram, Tumblr and TikTok. This was 2-handed session. Playing time was about 77 minutes. 2nd player won with 315 points while 1st player only got 247. Possibly the best score ever.
In this one, 2nd player managed to get 8 rows and columns each with 7 objects that got them 56 points while 1st player only got 2. Not only that. 2nd player also scored bigger in terms of area with connected objects and area with empty spaces, 24 objects and 8 spaces. 1st player only got 3 spaces and about 8 objects. Both only got one row to level 5.
:strip_icc()/pic9175832.jpg)
April 2025 session and more pictures of that session on Instagram and on TikTok. 2-handed session, one scored 258 and the other 230. I thought the losing side actually did better. They also did too much with Zen tiles which didn’t give higher score.
August 2024 session and more pictures of that session on Instagram and on TikTok. Forgot about only one unscored Zen Tile. The one that got wrong still won even after removing those scores.
November 2023 session and more pictures of that session on IG.
December 2022 session and more pictures of that session on IG.
October 2022 session and more pictures of that session on IG.
/pic8839157.jpg)
Summary
Miyabi is a tile laying game for 2 to 4 players. The theme is about building a Japanese style garden.
In this game, players will play over several rounds. Players take turns choosing one of the face up tile and place it on their player board with 6 x 6 grid. The tiles have 3 different sizes and 4 different shapes.
From the smallest polyomino tiles, with 1 x 1 size, to the biggest one with 1 x 3 size with either straight shape or C-shape. Each tile also has one type of object in one of the tile’s spaces.
There is a restriction as how we can place the tile. The part where the objects are printed on the tile must be placed in the specific row of the game board for that object. There are 6 different objects and one row for each object.
Another restriction is from the column. After each tile placement, we have to place a Lantern token on the column where the object on the tile is placed. This indicates that that we cannot place another tile on the same column for that round.
So, players get to take and place tile up to 6 times, spread out to 6 different columns per round. But they can still choose tiles with the same object.
By still following that restriction, we can also build upwards by placing the next tile above the previous ones. We cannot place them hanging or with holes right below the tile.
After each tile placement, we will gain score that is worth the size of the tile times the level of the layer. So, if we place a tile with size 3 on third layer, we will get 9 points while on first layer, we will only get 3.
Ideally, we want to place the bigger tile on top but the bigger tile requires bigger foundation. Early in the game we have to spend times to build big enough foundations to give more flexibility later.
The challenge is that the order of how the tiles and their object will come out is random. So, we cannot just focus on certain objects or row to go high or otherwise, we will place the tile at the bottom in the last round which score very little.
That is actually still a better way to still be able to place any tile. If we cannot place at all, we are essentially out of the round while the other players can still play and get more tiles to choose.
While this can be a mean thing for players to do a hate drafting, it’s more the fault of the player who cannot place the tile. Also, with the restriction from rows and columns, it is not very beneficial with trying to just mess with other players.
Every round, we know all of the tiles that we might take and place. But the other player can take them out first. We need to come up with some short-term planning for the round. At least to make sure that we can always place the tiles.
Early in the game, with empty board, we will want to take the big one first as it helps cover more spaces faster. However, later, the big tile that can only fit on lower layer is worth less than smaller ones on higher layer.
There is also a bonus that we can get by reaching the 5th layer first for each row. So, there is a racing element between players.
At the end of the game, there is a majority bonus for each row based on the number of visible objects of that row. The player with the most object will get highest bonus of the 2 and the second place will get the lower one.
Because of placing a tile on top of another tile, those objects might get covered and we have less visible objects.
I think the game is more interesting with just 2 players. With 2 players, we play 6 rounds while we have less with more players. It is also easier to control which tile we can take and let go. With more players, we have more choices but it is less predictable.
The game also comes with 5 expansion modules that we can combine all or just some however we want. 3 of them are actually just extra scoring conditions for final scoring without changing the gameplay at all. However, combining those 3 will still change how we should place the tile.
Most of the time, these 3 will matter probably in the last round. We are trying to make bigger group of adjacent spaces with or without objects or try to aim for 7 objects in either row or column.
We cannot do much in earlier rounds while in the last round, with these 3 it feels like we are just being lucky by getting that opportunity. Still, we can expand to increase the bonus.
The other two will use extra components and add extra steps of action and scoring within the game. With the Zen tile, we can get extra points by surrounding that Zen tile with objects. The scoring happens when we surround the tile based on the number of surrounding objects at that time.
The extra challenge is that we can only place the Zen tile on lower layer and cannot place any tile on top of that Zen tile. That will give restriction to how we place the tile later which doesn’t help us build upwards. On the other hand, if we build later, we might not have any space to place that tile.
The last module uses the Frog token that we can move on the board. We are trying to move the Frog up to higher layer and get points everytime it goes higher.
The challenge is that the Frog can only move to an empty space, one space on same level or upwards. This is true until it reaches the 4th layer.
We also cannot place any tile where the Frog is on. So, the Frog itself will become extra restriction but it can still move. But if we are not careful, it will get stuck and prevent us from building higher.
The rule and gameplay of Miyabi is very simple but there are more things to consider when placing the tile. Building upwards and the restriction from column and row is a step up in difficulty from regular tile laying game.
It’s a great game for those who love this spatial puzzle but some may not enjoy that.

More Similar Games
There are many tabletop games out there whether a board or card game that might share some similarities with Miyabi. Some people may look for those similarities that they enjoy. It can be the mechanism or even just the same theme or setting.
Usually, a board game will have a lot of elements. It is kind of difficult find another game where everything is similar. Which is why, in this section, I try to break them into things that I enjoy from the game and point out games that share the same experience.
These next games are just some games that I have tried, played and written a review for them, up to this point. Check out the link to each article to find out more and also check this Complete list for more games.
Tile Laying, Tile Stacking, Spatial Puzzle
The main part of Miyabi board game is the tile laying aspect. This kind of game usually have spatial puzzle. We need to consider where we should place the tile in connection to other tiles from previous turns and try to open opportunity with future turns.
There are a lot of games with that idea. However, in Miyabi, we get to stack those tiles that makes Miyabi a bit different than other games in this genre. Not only we need to consider the other tiles in adjacent space but also how we can open an opportunity to stack tiles in future turns.
What I like from a tile laying game is that we get to see our tableau grows and feel the sense of progression. With 3D aspect from it, we will see a structure at the end of the game.
The first game that I think has some similarities is Ankh’or. This is also a tile laying game where we can build upwards. However, in this one, we only use one size of tile, not a polyomino. This is also smaller in size and price.
Similar to Miyabi, before we can build upwards, we first need to build a foundation in Ankh’or. Every 4 adjacent tiles that creates a grid of 2 x 2, can be occupied by one tile above those 4 tiles. But there is a requirement. The tile at the top must share the same color as one of the tile that support it.
In Miyabi, the covered tiles at the bottom might not mean anything in the future. While in Ankh’or, we want to connect either the same color or the same animal type between the tiles in 2 different levels but still adjacent.
For card games that don’t use tiles but has tile laying mechanism, there is a specific genre called melding and splaying. In this type of game, the card will have a grid and we have to overlap them to the card previously placed onto our tableau.
It’s called melding because they don’t consider the difference in elevation. It’s like the cards are melding into one and create a different configuration. Similar to regular tile laying game, we will still see how the tableau grows.
Like in Miyabi, eventually we have to cover what’s already in the tableau using the new tile or card to open more opportunities in subsequent turns. The difference is that they are usually smaller and cheaper because they mostly use cards.
For this type of games, we can try Café, which is about processing coffee beans from producing until delivering them to either coffee shop or warehouse. The card has a 3 x 2 grid with 4 different types of icons.
In general, we want to try to connect the same type of icons so that they are adjacent to each other. We can activate each group of icon by spending one action point. The bigger the group with more icon will increase the result of that action.
Another similar game like this is Circle the Wagons. This is a 2-player only game, part of the Button Shy wallet games series. The cards in this one only has a 2 x 2 grid.
In general, we will just try to connect grid with either the same color or icons. However, each game there will be 3 different scoring conditions if we can fulfill extra requirements. Usually, we need to place the icons in certain configurations which are more complex than creating a bigger group of the same type. That scoring conditions are like the expansion modules from Miyabi.
What makes them unique is the drafting with the time track element. We can choose to skip some cards but those cards will go to the opponent’s tableau. But if we don’t skip them, the opponent will take the next card that might be helpful for us.
Another 2-player only game but in roll and write genre with tile laying experience is Kingdomino Duel. In this one, the two players will take turns drafting 2 dice each. Then each of them must create a domino tile using icons of those 2 dice which they will then draw on their own board.
The placement restriction in this is that we can only connect the same icon next to each other. We are still trying to make a group of the same icon type as larger as it can get.
One part of the domino tile might be something we can connect to our tableau. However, we want to make sure that the other half can still open an opportunity for future placement.
There are also games where the tile laying part is done collectively, instead of on player’s individual board. By the end of the game, we will still see the final result of our tableau.
This type of game also has some scoring conditions that one player’s effort on fulfilling the objective might also help the other players. At the same time, players can also actively try to block the progress of other players.
So, there will be more interactions between players than just from the drafting.
One of those games is OddVille. This game uses cards as the tile to build the city collectively. Each card will depict a road connecting at least 2 edges of the card. We can only connect the road part or the non-road part between the adjacent cards.
There is a bit of resource management in the game to get the required resources to build the card. We also need to do some hand management to decide which type of workers we will use next to either take resources, take building card or just take coins.
Another collective tile laying game is Streets. The tiles are big square cardboards, each will have a connecting road and a scoring condition. In this one, we can either extend the street up to 5 buildings or enclose it by creating an intersection.
What makes this one unique is that each building will attract different type and different number of meeples. Each meeple will increase the value of that one building and possibly other buildings in that same street. Once the street is closed, the scoring happens. We have to move the meeples on that street to an active street.
Players will want to catch them by placing the tile with the right type of buildings that attracts those people.
For building a 3D structure, Tumble Town is another one but instead of laying tiles or cards, we will lay and stack dice. This is also a city building game set in American West. Not only we will draft building cards but we will also draft a set of 3 dice with different colors.
Each building requires specific number of dice, colors and pip value. Once we have at least the same amount of dice, we can construct them to our player board. After that, the building can give extra power that the player can use.
The player board will also have extra criteria for the dice that if we fulfill them, we can get additional score. The criteria may require specific color of dice in certain elevation or specific size of the building.
Walking in Burano is another tile laying game using cards. In this one we will create the facade of colorful houses, each with 3 different floor levels. Ideally, each house can only have 1 color and the same color cannot be adjacent to each other.
To construct the 3 different levels, we have to start from the bottom up. The challenge is that the card with specific color for specific level may not show up yet. We will use 2 scaffolding cards for temporary placement.
What makes this unique is that for each completed house, we will also lay a character card. The characters will determine the scoring condition for that house or for the entire tableau of 5 houses. They might be interested in certain objects like cats, chimney, curtain, flowers and other things. Therefore, we have to build the facade accordingly.
Short-Term Planning
For me, the other challenging part of Miyabi is making sure that we can place the next 6 tiles every round. We cannot pass if we can find any way to place any of the tile.
The game itself already has restriction based on the row and column. As the game progresses, we eventually will start to stack. Placing on higher layer requires a foundation as we cannot place the tile hanging or create a hole.
With those restriction, we have to figure out which tile we should take and place first so that can be the foundation of the next one, like creating a combo of actions. However, the other player might have the similar idea which they can take the tile before us.
For that, we might also want to consider having a plan B. If the tile that we want is taken, we still have to make sure that we can still place the leftover tiles.
One game that I’ve played with similar idea would be Targi, a 2-player only game. Each round, we have to decide where to place the 3 Targi figures and the bonus for creating an intersection.
Both players will take turns placing one figure in this worker placement game until all 3 are placed. In order to get the card in the middle, we have to create the intersection between our 2 figures in specific row and columns.
We may take the one spot but the opponent may take the other. Therefore, we fail to create the exact intersection. So, we need to consider which spot to take first or have another plan should we fail.
That is just how we take the spots. We also need to make a plan for the order of activating the action from those spots. The tribe card that we resolve early might give benefit for the subsequent actions.
Similar to Targi is Coimbra, but this is a bigger game for more than 2 players. This also has bidding. The dice worker that we took and placed will determine the turn order of buying character cards.
There is a chance that the opponent might bid higher and push us out or take the card that we want. We need to consider the risk for that or just pursue different rows for different cards.
Even if we win the bid and get the card, there is a chance that we have to take the other cards. The other card might support the acquisition of the next card or give benefit during the next couple of phases.
I think we can find the same experience of short-term planning from games that use Action Point system. In Miyabi, it’s like every round we have 6 Action Points and we want to make sure to utilize those six.
I already mentioned Café in the previous section. In addition to tile laying and spatial puzzle, we also need to manage which actions to take every round. We start with 1 Action Point but we can increase it depending on the icons from the cards up to 8.
Because of linear order of processing coffee beans, we have to make the plan backwards and distribute the Action Points for the 3 different actions.
Another game with action point system is Tiny Epic Defenders. Of course, the theme is totally different from Miyabi. This is a tower defense game where we will move around characters to defend the outer areas of the Castle.
Each turn, one character can have 3 or 4 actions, they can spend to either move one space each, secure a city, activate ability or attack the final boss. With 2 characters, there will be 4 turns each round and we will try to utilize all of those 3 or 4 actions per turn.
The problem is that we don’t know when the turn will show up and for which character but we know that they eventually will. So, the first character can still prepare something for the next one.
Final Words
That is all I can share with you about Miyabi, a tile laying and tile stacking board game. I’m always interested in game with spatial puzzle, especially where we build something in 3-dimensional structure.
I may have missed something that I should have discussed regarding the game. Please don’t hesitate to point that out and share what you know related to this game and I will update this article.
I keep saying that these tabletop games can be a good way to spend some time without looking at the screen of our gadget. If we do have someone close, that we can play with, there are other games where we can play cooperatively or competitively but with a lot of player interaction.
The game can be very fast or like a filler type or it can take hours to play. Some games can also be played in solitaire mode and they are still more engaging than other entertainment activity. Some may say, it’s like a workout for the gray matter of our brain.
So, what is your experience on playing this game? If you know other games similar or even better than this, please do share via the comment section below. I would love to learn and play that game, assuming I can get a copy.
This article is just my notes about what I can find from the internet. Hopefully this can help anybody who reads it.
Thanks for reading.
Mark M.